
To organize a bathroom vanity, clear the countertop down to the three to five things you use every day, sort the rest into drawer dividers by routine (teeth, face, hair), and use the cabinet’s full height with stackable bins or a two-tier rack that fits around the pipes. Toss expired products first so you only organize what you actually use; the bathroom vanity organization ideas below cover the counter, drawers, cabinet and walls.
⏱️ Short on time?
Grab our FREE printable checklists — the exact routines behind every calm home on this blog:
📋 Room-by-Room Checklist (PDF)📅 Weekly Reset Checklist (PDF)
Part of our Bathroom Cleaning & Organization Guide, which brings every related post together in one place.
The good news: vanity chaos is one of the fastest organization wins in your home. The space is small, so a few smart changes make a visible difference the same day. These 21 ideas work for single sinks, double vanities, tiny pedestal setups, and rentals — most cost under $25 and take less than 30 minutes.
Countertop Ideas: Clear the Surface First
The countertop is what you see, so it’s what you fix first. A clear counter instantly makes the whole bathroom feel bigger and cleaner.
1. Corral daily essentials on one tray
Loose bottles scattered across the counter look messy even when they’re clean. Gather your daily items — soap dispenser, toothbrush holder, moisturizer — onto a single tray about 10 by 14 inches ($10–15). The tray creates a visual boundary: everything inside it looks intentional, and wiping the counter takes five seconds because you just lift the tray.
2. Decant into matching dispensers
Five mismatched bottles with clashing labels create visual noise. Pour hand soap, lotion, and mouthwash into a matching dispenser set ($15–20 for three). It’s the cheapest way to make a vanity look designed instead of accumulated — and refilling from bulk bottles stored under the sink saves money too.
3. Use a small two-tier shelf for vertical space
When counter space is measured in inches, go up. A small two-tier shelf ($12–18) holds cotton pads and daily skincare on two levels in the footprint of one item. Tuck it in the corner by the faucet — the dead zone nobody uses — and you have twice the storage without losing an inch of counter.
4. Give every person their own caddy
In a shared bathroom, the vanity war usually starts with mixed-up products. Give each person a small caddy or basket ($8–12) that holds only their items. Each person pulls out their caddy, uses it, and puts it back — no more hunting through someone else’s bottles, and the counter stays neutral territory.
5. Try the five-item counter rule
Here’s the habit that protects everything else: no more than five items live on the counter permanently. Count yours right now — most vanities hold twelve or more. Pick your five true daily essentials; everything else gets used and put away. If you love this rule, our small bathroom organization ideas show how it transforms the whole room.
6. Mount a magnetic strip for bobby pins and clips
Bobby pins vanish into thin air — until you give them a home. Stick a small magnetic strip ($5–8) inside a drawer or on the side of the vanity, and pins, clips, and tweezers snap right to it. You’ll stop buying replacement packs every month, and the counter stays free of tiny metal strays.
Inside the Vanity: Drawers and Cabinets
Most vanity storage is hidden, which is exactly why it becomes a black hole. A few dividers and bins turn hidden space into working space.
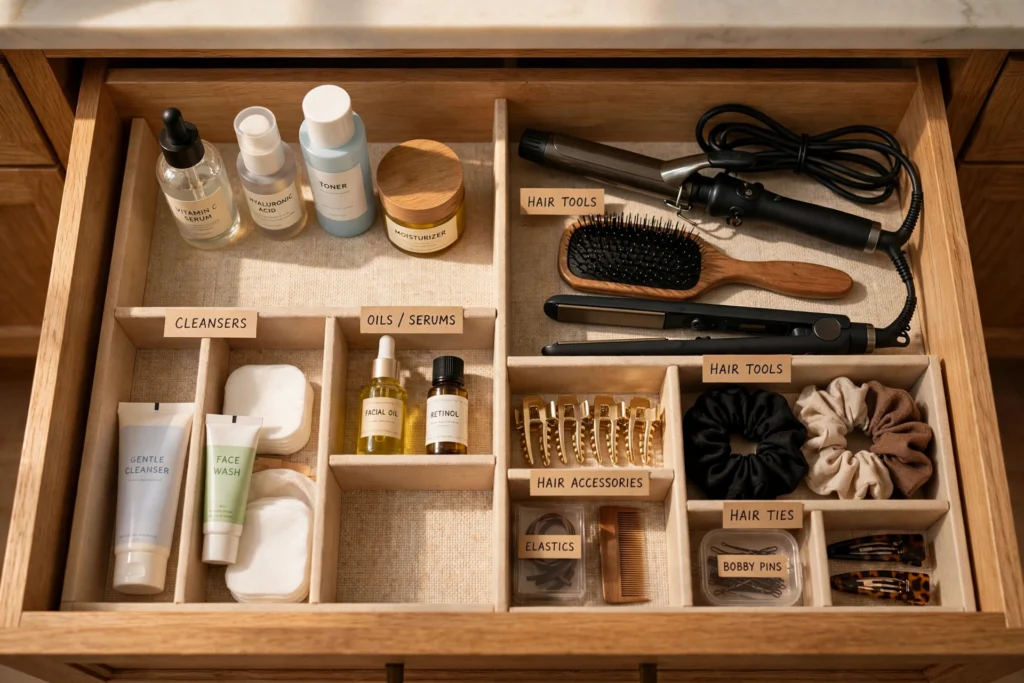
7. Divide drawers with spring-loaded dividers
Vanity drawers are usually deep and wide, so everything slides into one jumbled pile. Spring-loaded dividers ($10–15 for a set) expand to fit any drawer and create instant compartments: skincare, hair tools, first aid. No measuring, no cutting, and they work in rentals since nothing is permanent.
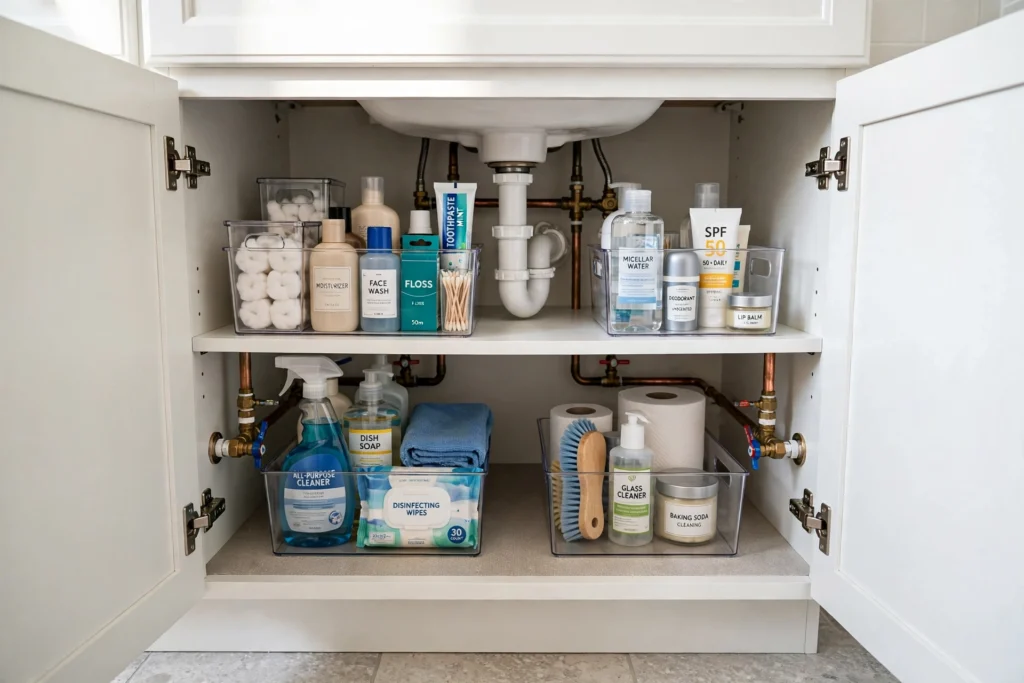
8. Stack clear bins inside the cabinet
The cabinet under the sink is awkward — pipes eat the middle, and deep shelves hide things in the back. Use clear stackable bins ($12–18 for a set) to sort backup products, cleaning supplies, and extra toiletries. Clear sides mean you can see what’s inside without pulling everything out, and bins slide out like drawers.
9. Hang a door-mounted organizer on the cabinet door
The inside of the cabinet door is free real estate. A slim over-door rack or adhesive organizer ($8–12) holds flat irons, curling irons, and spray bottles right where you need them. Heat-resistant holders are safest for hot tools, and this trick alone can free an entire drawer.
10. Add a pull-out organizer around the pipes
U-shaped pull-out trays ($20–30) are designed to fit around sink plumbing, turning the awkward under-sink zone into a sliding drawer. Cleaning supplies, extra soap, and backup shampoo live here instead of piling up on the counter. Measure around your pipes before ordering — most trays fit standard plumbing, but older sinks can vary.
11. Use small labeled bins for each family member
If several people share one vanity cabinet, label a small bin for each person ($3–5 each). Everyone’s extras — backup razors, specialty products, medicines — stay in their own bin instead of migrating across the whole cabinet. Labeling takes five minutes and prevents the slow creep that refills a cabinet within weeks.
12. Store hair tools in a heat-safe pouch
Hot tools need a safe landing spot. A heat-resistant pouch or silicone mat ($10–15) lets you set down a still-warm flat iron without scorching the counter or drawer. Hang the pouch on a hook inside the cabinet door, and your tools are stored safely the moment you’re done styling.
Wall and Vertical Storage Around the Vanity
When the vanity itself is full, the walls around it are your next frontier. Vertical storage adds capacity without taking a single inch of floor or counter.
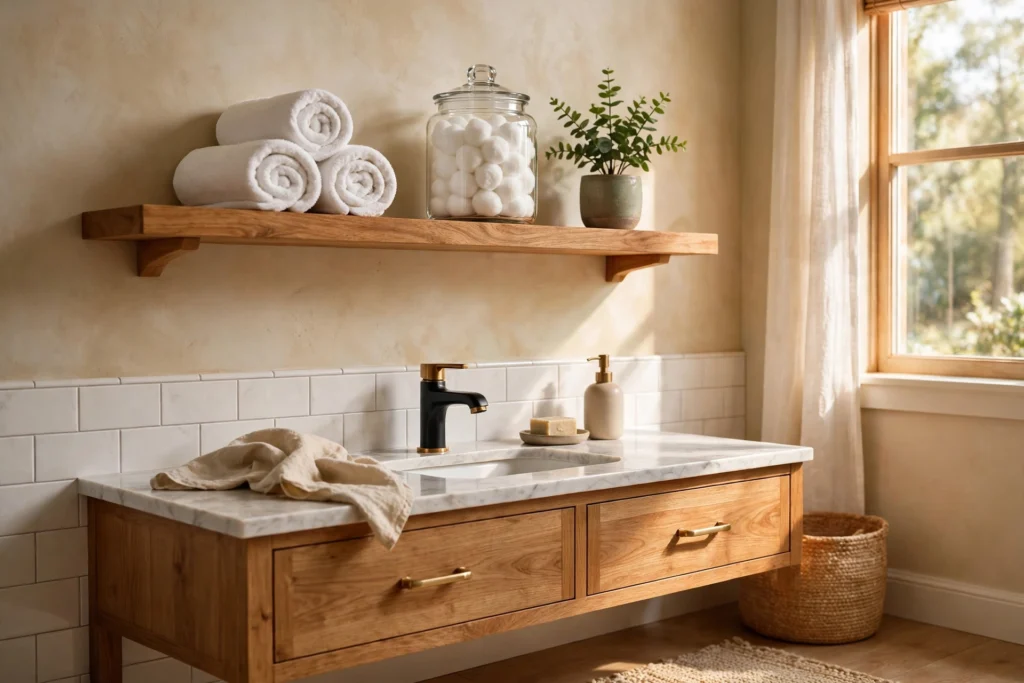
13. Float a shelf above the faucet
The wall space between the mirror and the ceiling is usually empty. One floating shelf ($15–25) holds rolled washcloths, a small plant, and a lidded jar of cotton balls. Style it lightly — this shelf is for pretty storage, not overflow.
14. Hang a towel ring or bar on the vanity side
The side panel of the vanity is prime real estate in a small bathroom. A towel ring or small bar ($8–12) mounted on the side keeps your hand towel within reach without touching the counter. Adhesive options exist for renters, and the towel dries faster hanging in open air than draped over the faucet.
15. Add a slim rolling cart beside the vanity
That 6-inch gap between the vanity and the wall? A slim rolling cart ($20–30) slides right in and holds extra toilet paper, cleaning supplies, and backup products. Measure the gap first — these come in 5, 6, and 8-inch widths, and guessing is how carts get returned.
16. Mount a wall-mounted toothbrush holder
Countertop toothbrush cups collect water and take up space. A wall-mounted holder ($10–15) with individual slots keeps brushes separated, dry, and off the counter. Some models include a small cup that detaches for rinsing. It’s a tiny change that frees a surprising amount of counter every single morning.
17. Use the mirror cabinet properly
If you have a mirrored medicine cabinet, treat it like prime real estate, not a junk drawer: daily items at eye level, lesser-used products up high, and small magnetic shelves inside the door for bobby pins. If your mirror is flat, a surface-mount medicine cabinet ($30–50) adds hidden storage without wall surgery.
Small Vanity and Rental-Friendly Fixes
Pedestal sinks and rental bathrooms come with extra limits — but they also reward creativity. These ideas need no drilling and no permanent changes.
18. Add an over-the-toilet etagere for overflow
When the vanity itself can’t hold everything, the wall above the toilet saves the day. A freestanding over-toilet shelf unit ($30–50) needs no drilling and instantly adds two or three shelves for towels and backup products. Our under-sink organization ideas pair perfectly with this one.
19. Use a pedestal sink skirt with pockets
Pedestal sinks offer zero storage — unless you add it. A sink skirt with built-in pockets ($15–25) wraps around the base and hides cleaning supplies behind fabric. It looks like a design choice, not a workaround, comes off in seconds when you move out, and washable fabric keeps it fresh.
20. Keep a “morning basket” for your routine
If your vanity is truly tiny, keep your whole morning routine in one portable basket ($10–15). Carry it to the bathroom, use what you need, and store it on a shelf or in a closet afterward. The counter stays permanently clear, and your routine travels with you — great for shared bathrooms and for anyone who gets ready in stages.
21. Do a weekly 5-minute vanity reset
Organization systems fail without upkeep, and the vanity is no exception. Set a weekly 5-minute reset: toss empties, return strays to their bins, wipe the counter, and check the five-item rule. Put it on the same day as your weekly reset routine and it becomes automatic. Five minutes a week beats a full reorganization every few months.
What Actually Works (and Common Mistakes)
The specifics that make the difference, with safety points checked against the public sources listed below.
- Date products when you open them. A fine-tip marker on the bottom saves guessing later. FDA notes manufacturers usually recommend discarding mascara two to four months after purchase, and that bathroom moisture can make it easier for bacteria and fungi to grow.
- Measure around the plumbing. Before buying an under-sink organizer, measure the clear width on each side of the drain pipe and the height to the bottom of the trap. Two narrow pull-out bins usually beat one wide one.
- Use a waterproof liner or tray under the sink. Check for drips once a month. EPA advises drying water-damaged areas within 24 to 48 hours to prevent mold, and a slow leak under a crowded cabinet often goes unnoticed for weeks.
- Clear out old medicines the safe way. FDA’s first choice is a drug take-back location or mail-back envelope; if neither is available and the medicine isn’t on the flush list, mix it with coffee grounds or cat litter, seal it in a bag and put it in the trash.
- Let hot tools cool before stowing them. Unplug curling irons and straighteners and give them a heat-resistant holder or a few minutes on the counter before they go into a drawer.
Common mistakes
- Storing cleaning products beside toothbrushes and cosmetics. Keep them in their original labeled containers, on a separate shelf or out of children’s reach.
- Using cardboard or fabric bins under the sink, where they soak up drips and mildew.
- Keeping backups of everything; one spare of each daily item is plenty.
Sources & safety notes: FDA: Shelf Life and Expiration Dating of Cosmetics · FDA: Where and How to Dispose of Unused Medicines · EPA: A Brief Guide to Mold, Moisture and Your Home. Safety points were checked against these pages on November 1, 2026. Spot something wrong? Tell us and we will correct it.
Save this for later
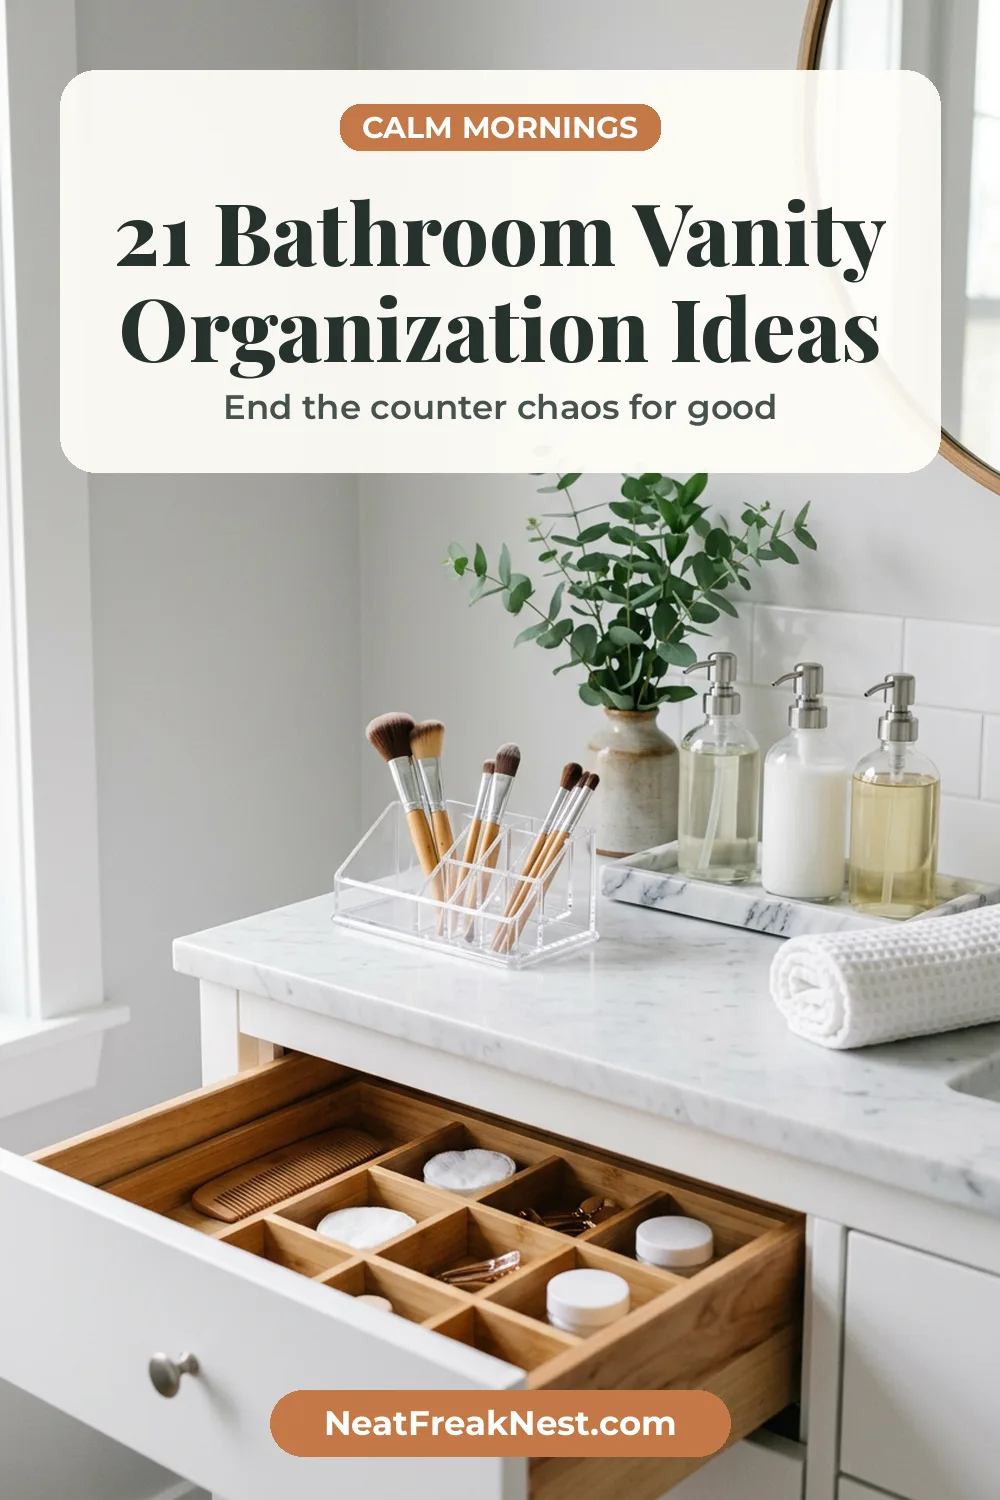
Pin this image to your Pinterest board so it’s there when you need it.
Bathroom Vanity Organization Ideas FAQ
How do I organize a bathroom vanity with no drawers?
Lean on the counter and walls: a tray for daily items, a two-tier shelf for vertical space, a door-mounted organizer inside the cabinet, and a slim rolling cart beside the vanity. Together these replace a drawer completely, with no permanent changes.
What should stay on the vanity counter?
Only what you use every single day: hand soap, toothbrush holder, one moisturizer, and maybe a hand towel. Everything else — backup products, styling tools, medicines — belongs in a drawer, cabinet, or bin. The five-item rule is the simplest way to decide.
How can renters organize a vanity without drilling?
Use adhesive hooks and strips, over-door racks, freestanding etageres, tension shelves, and rolling carts. Every rental-friendly idea in this guide needs zero holes and leaves no trace when you move out.
How often should I declutter the vanity?
Do a quick weekly reset (five minutes) and a deeper declutter every season. Toss expired products, empties, and anything you haven’t used in three months. A vanity stays organized only when old items leave as regularly as new ones arrive.
Your vanity doesn’t need to be bigger — it just needs a system. Start with the counter: one tray, the five-item rule, and a place for your hair tools. Then tackle one drawer or cabinet this weekend. Small, steady changes keep a vanity organized for good.
Want a printable to make the reset easier? Grab our free bathroom organization checklist — it walks you through every zone in this guide, one box at a time, so you can check things off as you go.