
To clean a pre-lit Christmas tree, unplug it, take it apart section by section, and remove dust with a dry method only: a soft duster or microfiber cloth on the branches, a soft paintbrush around the bulbs, and a vacuum brush held an inch away. Keep water and sprays off the wiring, then fluff the branches and test the lights before you decorate.
⏱️ Short on time?
Grab our FREE printable checklists — the exact routines behind every calm home on this blog:
📋 Room-by-Room Checklist (PDF)📅 Weekly Reset Checklist (PDF)
Part of our Living Room, Bedroom & Holiday Storage Guide, which brings every related post together in one place.
An artificial tree spends 11 months in a box, a closet or a garage, so it comes out dusty, a little flat and sometimes musty. On a pre-lit tree you can’t just hose it down or wipe it with soapy water like a plain plastic tree, because the light strands run through every branch. This guide shows exactly how to clean a pre-lit Christmas tree safely before you decorate, how to get rid of a musty smell, how to handle white and flocked trees, and how to clean it again before it goes back into storage.
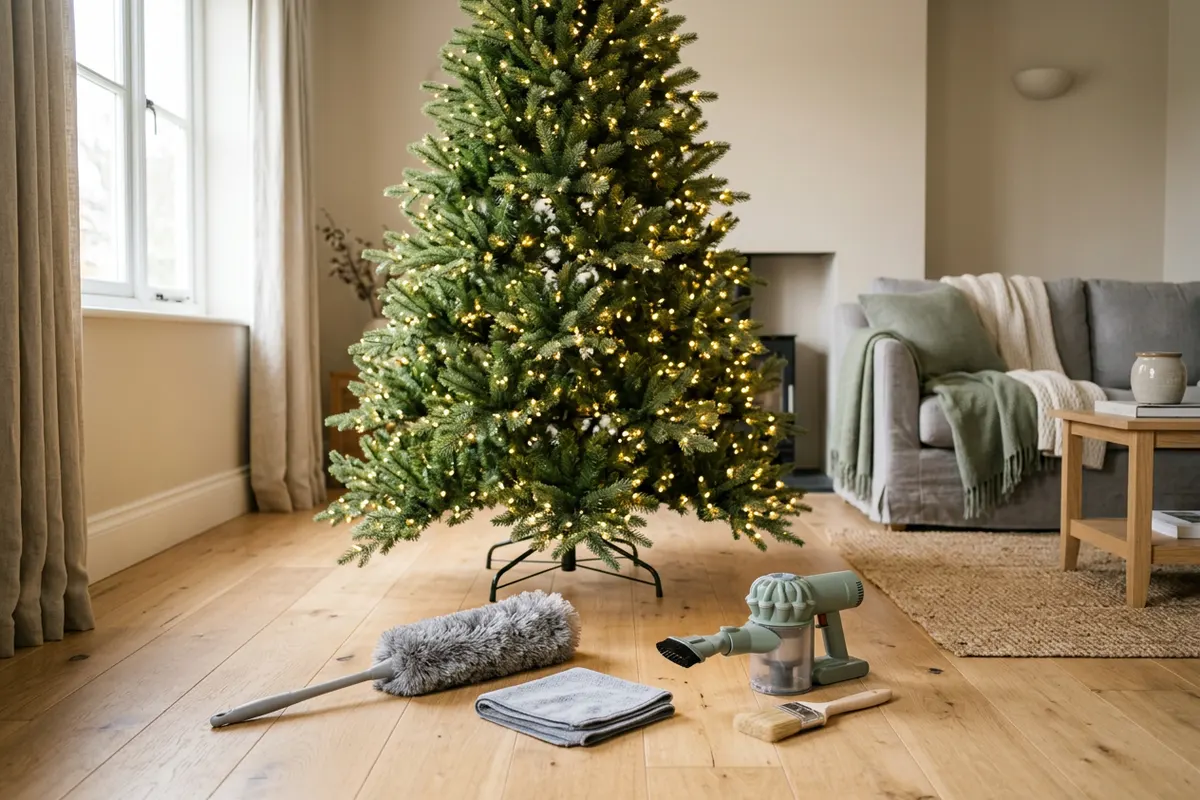
Why Pre-Lit Trees Need a Dry Clean
A pre-lit tree has hundreds of sockets, wire clips and section plugs tucked inside the branches. Water, vinegar sprays and household cleaners can seep into sockets and connectors, corrode contacts and cause dark sections or shorts later. Most manufacturers tell you to use a dry cloth or duster only, and using liquids can void the warranty. Dry cleaning is also simply enough: what’s on a stored tree is almost always loose dust, lint and a few crumbs of packing material, not grime that needs soap.
The rule of thumb: dust is removed dry, smells are removed with air and baking soda, and only the metal pole and plastic stand ever get a damp wipe, and only with the tree unplugged and those parts dried fully before power goes back on.
What You Need
- A microfiber duster or a soft feather duster (an extendable one for the top section)
- Two dry microfiber cloths
- A soft 1 to 2 inch paintbrush or makeup brush for around bulbs
- A vacuum with a soft brush attachment, or a handheld vacuum on low
- A can of compressed air or a hair dryer on the cool setting (optional)
- An old sheet or drop cloth to work on
- Baking soda and a few shallow bowls or cotton bags (for musty smells)
- Cotton gloves (optional, they make wiping branches faster)
How to Clean a Pre-Lit Christmas Tree in 7 Steps
Step 1: Unplug everything and separate the sections
Unplug the tree from the wall and disconnect the plugs between sections (most trees have a plug at the top of each section or a pole-to-pole connection). Work on one section at a time on a sheet in a bright room, a porch or a clean garage floor. If the tree was already up and lit, let the bulbs cool for 15 minutes first.
Step 2: Shake out loose dust outdoors
Carry each section outside and give it a few gentle shakes, holding it by the pole, not by the branches or the wires. This removes most of the loose dust and old tinsel in under a minute and keeps it out of your living room.
Step 3: Inspect the lights and cords
Before you clean, check the plug, cords and sockets under good light. Look for frayed or cracked insulation, scorch marks, loose sockets or bent plug blades. Replace missing or broken bulbs only with the type the manufacturer specifies. If a cord is damaged, don’t tape it and don’t use that section’s lights; contact the manufacturer for a replacement strand or retire the tree’s lights and add separate strands.
Step 4: Dust the branches from the top down
Starting at the top of each section, run the microfiber duster or a cloth along each branch tip toward the outside, working around the tree. Use a gloved hand to slide along thicker branches. Then use the soft paintbrush around bulbs and wire clips, brushing parallel to the branch so you don’t snag the wire. This is the slowest part, about 10 minutes per section on a 7.5-foot tree, and it makes the biggest difference.
Step 5: Vacuum stubborn dust (gently)
For heavier dust, set the vacuum to its lowest suction with the soft brush attachment and hold it about an inch from the needles. Never press the nozzle into the branches or near the bulbs, because it can pull off tips or pop bulbs out of sockets. A trick some people use: stretch a piece of old pantyhose or mesh over the nozzle so only dust gets through. Compressed air or a cool hair dryer works well to blow dust out of the dense inner branches.
Step 6: Wipe the pole and stand
The metal center pole and the stand are the only parts that can take a barely damp cloth. Wipe them with a cloth dampened in warm water and a drop of dish soap, then dry immediately with a second cloth. Keep the cloth away from the plug ends at the top and bottom of each pole. Let the pole air-dry for 30 minutes before you reconnect anything.
Step 7: Reassemble, fluff and test
Put the tree back together, plug the sections into each other, and test the lights before you add a single ornament. Then fluff the branches from the bottom up, separating each tip. Fluffing exposes inner branches you couldn’t reach, so give those a final quick pass with the duster. Now it’s ready for decorating; our guide to organizing Christmas ornaments makes the next step faster.
How to Get a Musty Smell Out of an Artificial Christmas Tree
A musty or mildew smell usually means the tree was stored somewhere damp, like a basement or an uninsulated garage, often in a cardboard box. Here’s how to fix it without wetting the lights:
- Air it out: set the sections up in a dry, ventilated room or a covered porch on a dry day for 24 to 48 hours. A fan pointed across the branches speeds it up.
- Use baking soda: sprinkle a thin layer of baking soda on the tree sections laid on a sheet, leave it for a few hours, then shake it off outdoors and vacuum lightly. Keep the powder off the sockets.
- Absorb the rest: place shallow bowls of baking soda or activated charcoal under the tree for a few days.
- Check for mold: if you see fuzzy spots or dark patches (not just dust), the tree has mold. On an unlit tree you can wipe affected branches with diluted white vinegar and dry them fully, but on a pre-lit tree with mold near the wiring, it’s usually safer to replace the tree.
A brand-new tree can also have a plastic or chemical smell when it’s first unboxed. That fades with the same airing-out step, ideally in a garage or near open windows for a day or two before you bring it in.
How to Clean a White or Flocked Pre-Lit Tree
White trees show dust and yellowing more than green ones. Use the same dry method, but change your microfiber cloth often so you aren’t spreading gray dust around. Store white trees away from sunlight and attic heat, which cause yellowing.
Flocked trees need the gentlest touch, because the snowy coating sheds when rubbed. Skip the cloth on the flocked tips. Instead, use compressed air or a hair dryer on cool from about 12 inches away, and a very soft paintbrush on any dusty spots. Expect some flocking to fall the first time you set it up each year; lay a sheet under the tree while fluffing, and vacuum the floor afterward.
Pre-Lit vs Unlit Tree: What Changes
| Task | Pre-lit tree | Unlit tree |
|---|---|---|
| Dusting | Dry duster, cloth and soft brush only | Dry dusting first |
| Damp wiping | Pole and stand only | Branches can take a damp cloth with mild soap |
| Spraying with water or hose | Never | Only if the manufacturer allows; dry fully |
| Vacuuming | Low suction, 1 inch away, avoid bulbs | Low suction with brush attachment |
| Drying time before storage | Make sure everything is bone dry | 24 hours if any water was used |
| Smell removal | Air out + baking soda | Air out + baking soda or diluted vinegar |
How to Clean It Before Storing It Away
Cleaning the tree before it goes back into storage is the best way to make next year’s setup quicker. After the holidays, remove every ornament, hook and strand of tinsel, then repeat Steps 2, 4 and 5. Make sure the tree is completely dry and dust-free, then compress the branches gently and pack each section into a storage bag or plastic bin rather than the original cardboard box, which absorbs moisture and attracts pests. Store it in a climate-controlled closet or under a bed rather than a damp basement or a hot attic. Our after Christmas clean up checklist walks through the whole take-down day, and our guide to storing Christmas lights covers extra strands so they don’t tangle.
Tuck a cotton bag of baking soda or a couple of cedar blocks into the storage bag to keep it smelling fresh. If you keep holiday bins in a garage, use the shelving ideas in our garage organization ideas to keep them off the floor.
Pre-Holiday Tree Cleaning Timeline
| When | What to do | Time |
|---|---|---|
| 1 week before decorating | Unbox, air out sections, check for smells or mold | 10 min + airing |
| 3 days before | Inspect lights and cords, replace bulbs | 20 min |
| Decorating day | Shake, dust, vacuum, wipe pole, assemble and test | 45 to 60 min |
| Mid-season | Quick dust of lower branches and tree skirt | 5 min |
| Take-down day | Remove decor, dust again, dry and pack | 30 min |
If you’re getting the whole house ready, pair this with our holiday cleaning checklist and the declutter before Christmas plan so the tree goes up in a clean, clear room.
Mistakes to Avoid
- Spraying cleaner or water on the branches: moisture in sockets and plugs is the main way pre-lit trees fail.
- Cleaning while plugged in: always unplug and disconnect sections first.
- Pulling on bulbs or wires: a loose bulb can darken a whole section; brush around them.
- Pressing the vacuum into the branches: it pulls off tips and bulbs.
- Storing it damp or in cardboard: that’s how the musty smell starts.
- Skipping the light test: test before decorating, not after the ornaments are on.
Safety Notes and Sources
The U.S. Consumer Product Safety Commission’s holiday safety guidance recommends looking for the “fire resistant” label when buying an artificial tree, never stringing together more than three sets of incandescent lights, and never overloading electrical outlets. Always follow the instructions that came with your own tree; if they allow a different method, theirs comes first. Source: CPSC Holiday Safety.
Related guides
Save this for later
Pin this image to your Pinterest board so it’s there when you need it.
 Save to Pinterest
Good to know: If your tree came with a care card or manual, follow it first. Some brands allow only a dry cloth, and using liquids can void the warranty.
Frequently Asked Questions
Can you clean a pre-lit Christmas tree with water?
No. Keep water and sprays off the branches of a pre-lit tree, because moisture can get into sockets and plugs. Use a dry duster, microfiber cloth, soft brush and a vacuum on low. Only the metal pole and stand can take a barely damp cloth, dried right away.
What is the best way to clean a dusty artificial Christmas tree?
Shake each section outdoors, then dust the branches from the top down with a microfiber duster, use a soft paintbrush around bulbs, and finish with a vacuum brush on low held about an inch from the needles. Compressed air helps with inner branches.
How do I get a musty smell out of my artificial Christmas tree?
Air the sections out in a dry, ventilated space for 24 to 48 hours with a fan, sprinkle baking soda on the branches and shake it off after a few hours, and set bowls of baking soda or charcoal under the tree. Store it in a sealed bag in a dry spot next year.
Can you vacuum an artificial Christmas tree with lights?
Yes, gently. Use the lowest suction with a soft brush attachment and hold it about an inch away from the branches. Avoid the bulbs, and never press the nozzle into the tree.
How often should you clean an artificial Christmas tree?
Clean it twice a year: once before decorating and once before you pack it away. A quick dust of the lower branches mid-season helps if you have pets or a fireplace nearby.
Cleaning a pre-lit Christmas tree takes under an hour: unplug it, shake and dust each section dry, brush around the bulbs, wipe only the pole, then fluff and test. Do it again before storage and next year’s tree will come out of the box fresh and bright.