
To organize a craft room in a small space, sort supplies into zones by activity (paper, fabric, paint, tools), store them in clear or labeled containers on the walls and in a rolling cart, and keep only current projects on the work surface. Even a closet or a 4-foot stretch of wall can hold a full craft setup when every supply has one home.
⏱️ Short on time?
Grab our FREE printable checklists — the exact routines behind every calm home on this blog:
📋 Room-by-Room Checklist (PDF)📅 Weekly Reset Checklist (PDF)
Part of our Decluttering & Small Space Organizing Guide, which brings every related post together in one place.
The good news: small craft spaces can work beautifully, sometimes better than big ones, because every supply has to earn its spot. These 19 ideas are built for spare bedrooms, closet nooks, living-room corners, and apartments — most cost under $30, many are renter-friendly, and none require a dedicated room.
Set Up Zones Before You Buy Anything
Jumping straight to bins and baskets is the classic craft-room mistake. Decide what goes where first, and the storage almost chooses itself.
1. Sort supplies by craft, not by container
Empty every drawer and bag, then sort into piles by craft: paper and cardmaking, sewing and fabric, painting, jewelry, and general tools. You will probably find duplicates you forgot you owned — three pairs of scissors, two glue guns, five packs of the same cardstock. Keep the best of each duplicate and pass the rest on. Sorting by craft also tells you which craft actually needs the most space, so you stop giving equal room to a hobby you tried once and one you do weekly.
2. Create five zones: store, work, dry, display, and in-progress
Every craft space needs the same five zones, even if some are just a shelf or a tray. Store is closed storage for supplies. Work is a clear surface. Dry is a flat spot where wet projects can sit undisturbed. Display holds finished pieces. In-progress holds only the project you are working on right now. When zones blur — when drying paintings land on the work surface and supplies pile on the display shelf — the whole room feels chaotic even when it is technically “organized.”
3. Give every supply a home with a label
A bin without a label becomes a junk drawer within a month. Label everything, even clear bins, with what belongs inside and, if it helps, the craft it serves: “Watercolor paints,” “Sewing notions,” “Card bases.” Labels also let family members put things back correctly, which matters in a shared small space. A simple label maker ($20–25) pays for itself in saved hunting time.
4. Keep only one project out at a time
The one-project rule is the single habit that keeps a small craft space usable. When you finish — or pause — a project, it goes back into its in-progress bin before the next one comes out. Two or three projects spread across the table is how a craft corner becomes unusable. If you love switching between projects, keep each in its own labeled bin so swapping takes a minute, not a cleanup.
Use the Walls: Vertical Storage Is Your Best Friend
In a small space, floor and table space are precious, but wall space is usually free. Moving storage upward is the fastest way to gain room.
5. Hang a pegboard for tools and small supplies
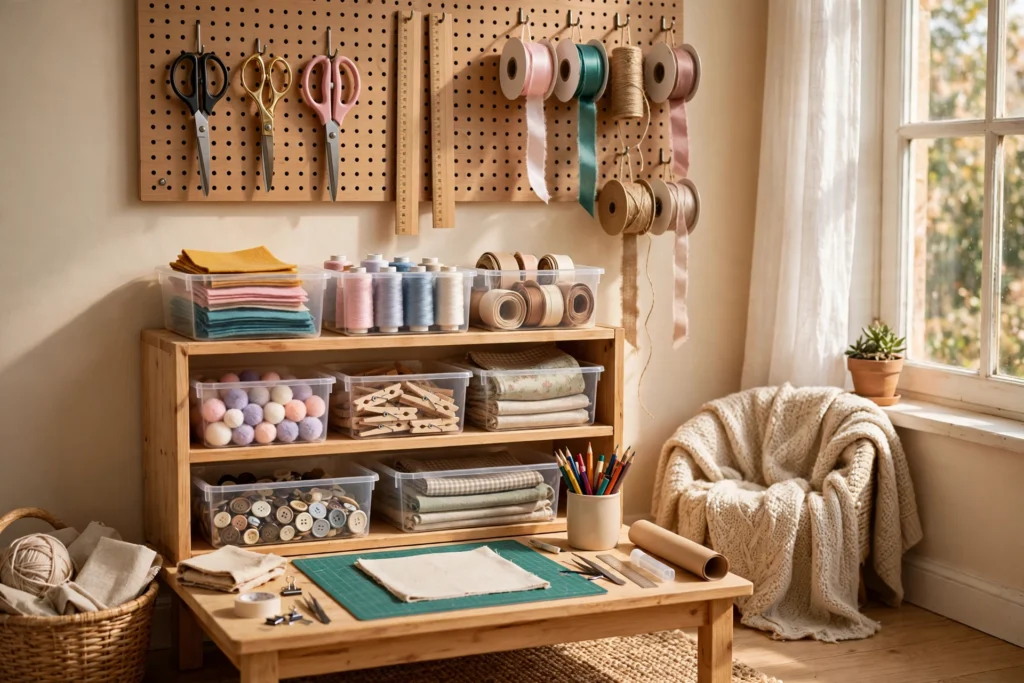
A pegboard ($20–30) above the work surface holds scissors, rulers, tape, ribbon, punches, and small tools where you can see and grab them. Outline each tool’s spot in marker so missing items are obvious at a glance. Pegboard is renter-friendly too — lean a framed board against the wall or hang it with adhesive strips if drilling is not allowed. Our rental-friendly organization ideas have more no-drill options that work the same way.
6. Mount shelves all the way to the ceiling
Most craft rooms waste the top two feet of wall. Run shelves high for rarely used supplies — seasonal decor, bulk paper, backup stock — and keep daily supplies at arm’s reach below. Label the high bins clearly so you are not climbing up to check what is inside. High shelves turn dead air into a whole extra storage zone.
7. Use the back of the door for ribbon and small items
An over-door rack or clear pocket organizer ($10–15) holds ribbon spools, markers, glue sticks, and small embellishments without taking a single inch of shelf space. Ribbon on dowels threaded through the rack unrolls cleanly without tangling, which beats digging through a drawer of loose spools every time.
8. Try a fold-down desk if floor space is tight
A wall-mounted fold-down desk ($40–60) gives you a full work surface that folds away when you are done, freeing the room for other uses. Inside the folded desk, shallow compartments can hold the tools you reach for most. This is the best solution for a craft corner in a living room or bedroom, where a permanent desk would dominate the space. Pair it with a rolling cart (idea 12) for supplies, and you have a complete craft station that disappears in seconds.
Store Supplies by Type, in Clear Containers
Craft supplies come in awkward shapes, which is why one-size-fits-all bins fail. Match the container to the supply type and you will actually find things.
9. File paper upright like books, sorted by color
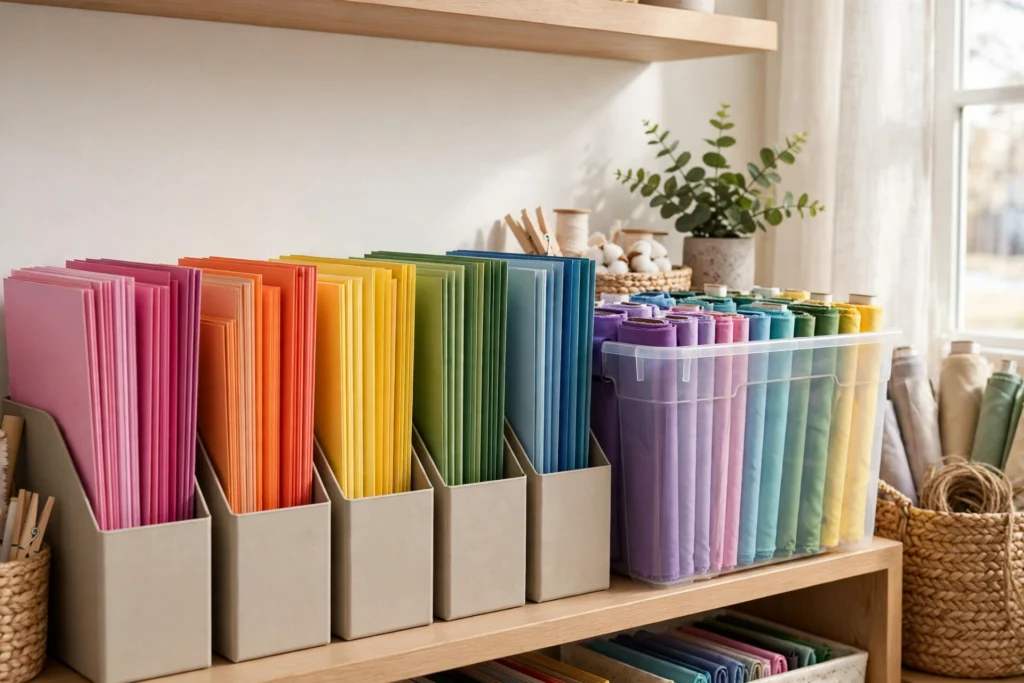
Stacking paper flat buries the color you want at the bottom. File cardstock and patterned paper upright in magazine holders or vertical sorters, grouped by color family. You can flip through and pull one sheet without disturbing the rest, and you can see at a glance which colors are running low. Keep a small scrap bin beside the paper station — sorted by color too — so offcuts get reused instead of tossed.
10. Keep fabric in clear bins, rolled not folded
Rolled fabric takes less space than folded stacks, does not crease, and lets you see every print at a glance. Roll each piece, stand the rolls upright in a clear bin, and sort by color or project. If you sew regularly, our small closet organization ideas show how the same roll-and-file method works for any soft, bulky material. One clear bin of rolled fabric replaces a whole shelf of folded piles.
11. Corral paint in a caddy, not scattered bottles
Paint bottles rolling around a drawer is how colors get lost and lids get stuck. Keep paints upright in a small caddy or a spinning turntable ($10–15) sorted by type — acrylics together, watercolors together, fabric paints together. A caddy also travels: carry it to the table, paint, and put the whole caddy back, instead of ferrying bottles one by one.
12. Use a rolling cart as your mobile supply station
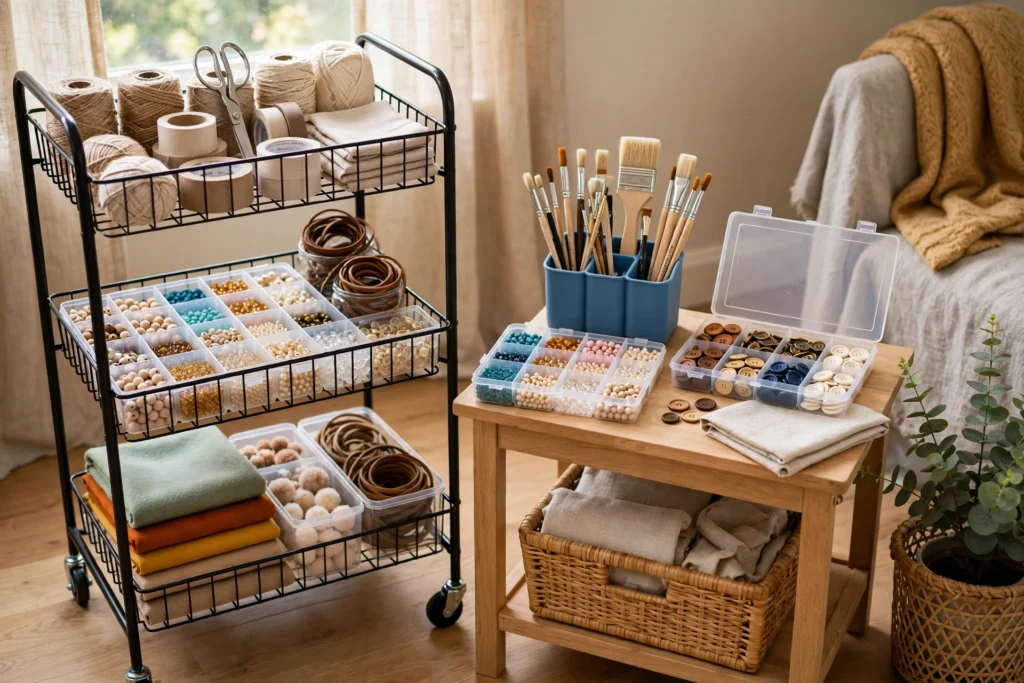
A three-tier rolling cart ($25–35) is the workhorse of small craft rooms. Load the top tier with current-project supplies, the middle with tools, and the bottom with paper or fabric. Roll it to the table when you craft, roll it into a closet when you are done. Carts also solve the shared-space problem: your supplies stay together and out of sight, without needing a room of their own.
13. Sort small items in compartment boxes with labels
Beads, buttons, sequins, brads, and eyelets need small compartments, not big bins where they mix into confetti. Use clear compartment boxes ($8–12 each) with one type per section, labeled on the lid. Stack the boxes on a shelf or in a drawer, and keep a small tray on the work surface for the pieces you are actively using so they do not scatter.
Furniture and Habits for Tiny Craft Spaces
The right furniture does double duty in a small space, and the right habits keep it from refilling the moment you tidy it.
14. Choose furniture that hides supplies
A desk with drawers, a storage ottoman, or a cabinet with doors beats open shelving in a small room, because closed storage hides visual clutter even when the inside is imperfect. Reserve open shelves for pretty, display-worthy supplies — jars of colorful buttons, neatly rolled fabric — and hide the rest behind doors. The room will feel calmer even on a busy crafting day.
15. Turn a closet into a craft station
A spare closet is often the best craft room in a small home: remove the door or hang a curtain, add a shelf at desk height, mount a pegboard on the back wall, and slide a rolling cart underneath. Close the curtain and the whole station disappears. Closet craft stations work especially well in apartments where no spare room exists — and they keep supplies away from pets and small children.
16. Photograph and file inspiration instead of hoarding samples
Crafters collect samples, swatches, and magazine pages “for inspiration” until the inspiration pile needs its own shelf. Photograph anything you want to remember, save it in a folder on your phone by project type, and recycle the physical copy. Digital inspiration takes no space, is searchable, and never gets buried. Keep only physical samples you will genuinely cut, sew, or paint with.
17. Do a seasonal supply audit — one craft at a time
Once a season, audit one craft category: pull it out, toss dried-out paints and broken tools, donate supplies for crafts you no longer do, and restock only what you actually used. Doing one category at a time keeps the audit under 30 minutes, and rotating through categories across the year means everything gets checked without a dreaded whole-room purge. Tie it to your weekly reset routine once a season and it becomes automatic.
18. Keep a “donate” box permanently in the craft space
When you find a duplicate tool, a color you hate, or supplies for a craft you have outgrown, drop them straight into a small donate box instead of back onto the shelf. When the box fills, it goes to a school, charity shop, or craft group. A permanent outbox stops the slow accumulation that fills small spaces fastest, because unwanted items leave immediately instead of waiting for a big declutter.
19. Protect the work surface with a “clear by night” rule
End every crafting session by clearing the work surface completely: tools back in their homes, in-progress project in its bin, scraps in the trash or scrap bin. A clear surface the next morning makes starting again inviting instead of overwhelming — and in a small home, that surface may be the dining table someone else needs for dinner. Five minutes of closing up saves a weekend of reorganization later.
What Actually Works (and Common Mistakes)
The specifics that make the difference, with safety points checked against the public sources listed below.
- Sort by activity, not by container. Everything for card-making lives together; everything for sewing lives together. You grab one bin per project instead of six.
- Use the wall. A pegboard or slatwall over the desk holds scissors, rulers, tape and ribbon on hooks at eye level, freeing the desktop.
- Keep paints, solvents and adhesives in their original containers. EPA classes products like paints and solvents as household hazardous waste that needs special care, and advises keeping them in labeled original containers, not unlabeled jars.
- Ventilate for sprays and solvents. EPA lists hobby products among indoor air pollution sources; open a window or work outdoors with spray adhesive, spray paint or resin.
- Unplug hot tools. The U.S. Fire Administration advises unplugging small appliances when not in use, so give the glue gun and heat tool a stand and pull the plug when you step away.
Common mistakes
- Buying matching organizers before you know how much of each supply you actually keep.
- Opaque bins with no labels, so supplies get re-bought.
- Keeping every scrap. Set a single scrap bin per material; when it is full, the oldest pieces go.
Sources & safety notes: EPA: Household Hazardous Waste · EPA: Introduction to Indoor Air Quality · U.S. Fire Administration: Appliance and Electrical Fire Safety. Safety points were checked against these pages on November 1, 2026. Spot something wrong? Tell us and we will correct it.
Save this for later
Pin this image to your Pinterest board so it’s there when you need it.
Craft Room Organization Ideas FAQ
How do I set up a craft room with no spare room?
Use a corner, a closet, or a fold-down desk plus a rolling cart. The essentials are a work surface, wall storage for tools, and closed bins for supplies — all of which fit in a closet or a few feet of wall. You do not need a dedicated room, just dedicated zones.
What is the best way to store craft paper in a small space?
File it upright by color in magazine holders or vertical sorters. Upright filing uses shelf height instead of table space, lets you pull one sheet without disturbing the stack, and shows at a glance which colors need restocking.
How do I keep a small craft space from getting messy again?
Follow the one-project rule, clear the work surface at the end of every session, and keep a permanent donate box for unwanted supplies. Those three habits matter more than any organizer, because small spaces refill fast when items have nowhere to go.
Can I organize a craft room on a budget?
Yes. Start with a pegboard, a rolling cart, clear compartment boxes, and labels — usually under $75 total. Add shelves and a fold-down desk later if you need them. The most effective changes in this guide are habits and zones, which cost nothing.
A small craft room is not a compromise — it is a design constraint that forces good decisions. Sort by craft, build your five zones, move storage up the walls, and let a rolling cart carry the rest. Start this weekend with one zone, maybe the paper station or the pegboard, and add the next zone when the first one feels natural. Before long, the space that once swallowed supplies will be the room you love working in most.
Want a printable to plan your zones? Grab our free home organization checklist — it includes a craft-room section you can check off zone by zone as you set yours up.