
To organize kitchen countertops, leave out only what you use every day, group it into zones (coffee, prep, cooking), and corral small items on a tray so the counter wipes clean in seconds. Everything else, from mail to rarely used appliances, moves into cabinets or a landing basket outside the kitchen. The kitchen countertop organization ideas below walk through each zone.
⏱️ Short on time?
Grab our FREE printable checklists — the exact routines behind every calm home on this blog:
📋 Room-by-Room Checklist (PDF)📅 Weekly Reset Checklist (PDF)
Part of our Kitchen Cleaning & Organization Guide, which brings every related post together in one place.
The secret isn’t fancier containers. It’s deciding what actually earns a spot on the counter, giving everything else a home and styling what stays so it looks intentional. These 17 kitchen countertop organization ideas work in tiny apartment kitchens, busy family kitchens and everything in between.
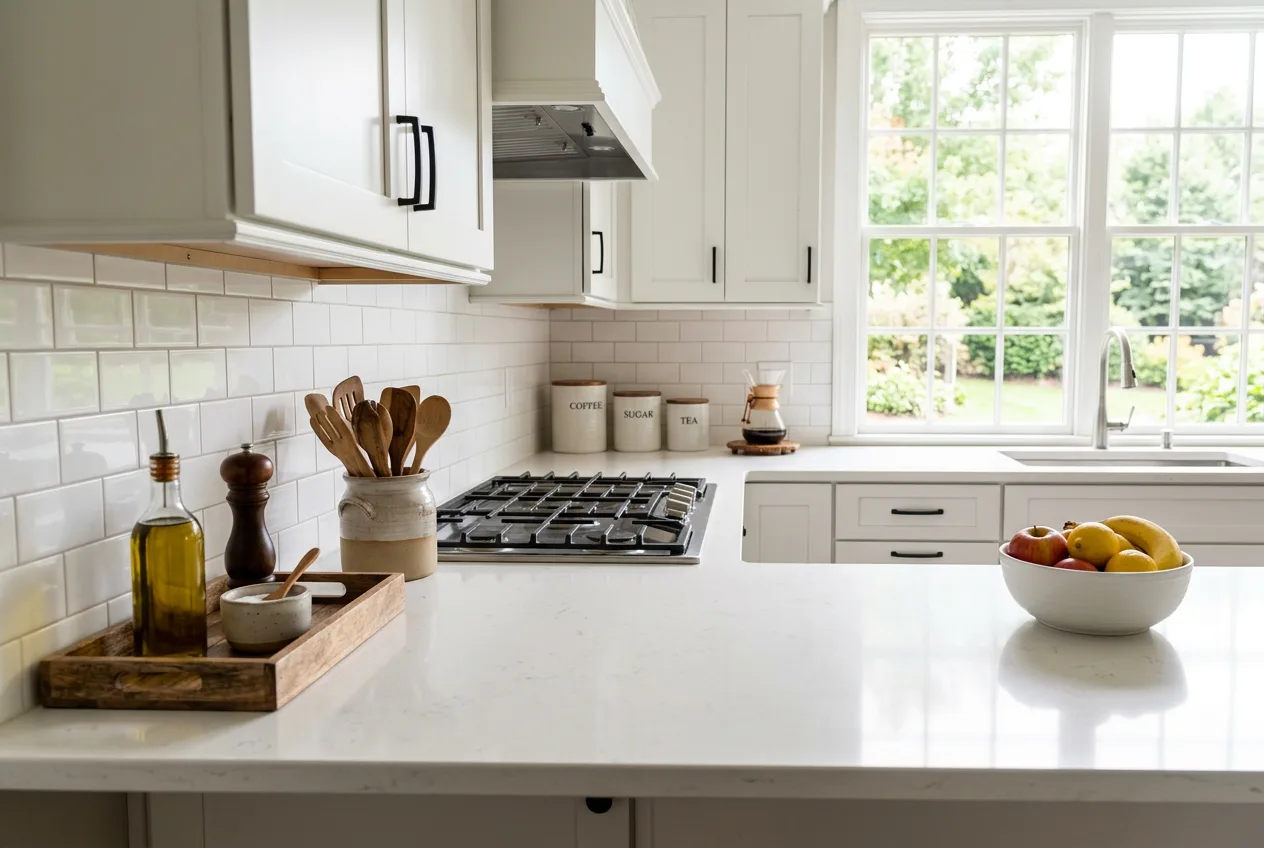
Decide What Earns Counter Space
1. Clear everything off and start fresh
Take every item off your counters, wipe them down and only put things back with intention. It sounds dramatic, but it’s the fastest way to see your kitchen with fresh eyes. You’ll quickly notice items that haven’t been touched in weeks and things that drifted in from other rooms.
2. Use the “daily use” rule
A simple test decides what stays: if you use it every day, or nearly every day, it can live on the counter. The coffee maker, a knife block or utensil crock, salt and pepper and maybe a fruit bowl usually pass. The stand mixer you use twice a month, the waffle maker and the bread machine usually don’t. Everything that fails the test moves into a cabinet, the pantry or an appliance shelf.
3. Relocate things that don’t belong in the kitchen
Counters collect mail, keys, chargers, school papers, receipts and sunglasses. Give each of those a home somewhere else: a wall pocket or tray by the entry for mail and keys, a charging station in a drawer or the living room and a paper sorter in the office. Our junk drawer organization ideas help you build a home for the small bits that keep migrating to the counter.
4. Keep one stretch completely clear for prep
Decide on one stretch of counter, ideally between the sink and the stove, that stays completely empty. This is your prep zone. Nothing lives there, so you always have space to chop, roll dough or set down groceries. Having one protected zone changes how the entire kitchen feels, even if other counters still hold a few essentials.
Zone Your Counters Around How You Cook
5. Create a cooking station next to the stove
Keep the things you grab mid-recipe within arm’s reach of the stove: a crock of wooden spoons and spatulas, cooking oil, salt and pepper. Everything else, including backup spices and vinegars, belongs in a nearby cabinet or drawer. Our spice cabinet organization ideas show how to keep the rest of your seasonings easy to reach without crowding the counter.
6. Set up a dedicated coffee or tea station
If coffee is a daily ritual, give it its own corner with the machine, a canister for beans or pods and a small tray for sugar and spoons. Keeping mugs in a cabinet directly above the station saves steps and keeps the setup tidy. See our coffee station organization ideas for setups that fit counters, carts and tiny corners.
7. Keep the sink zone simple
The sink area tends to collect sponges, brushes, multiple soaps and drying racks. Pare it down to one dish soap, one hand soap and one sponge or brush in a caddy or on a small tray. Move extras under the sink, where our under-sink organization ideas help you store refills and cleaning supplies neatly. If you hand-wash a lot, choose a drying rack that folds or rolls up when you’re done.
8. Give fruit and bread one home
A single fruit bowl and a bread box or bin keep produce and baked goods from spreading across the counter. Keep produce that ripens on the counter, like bananas, tomatoes and avocados, in the bowl and move the rest to the fridge. A bread box with a flat top can double as a riser for a small plant or a cookbook stand.
Contain and Style What Stays
9. Group small items on trays
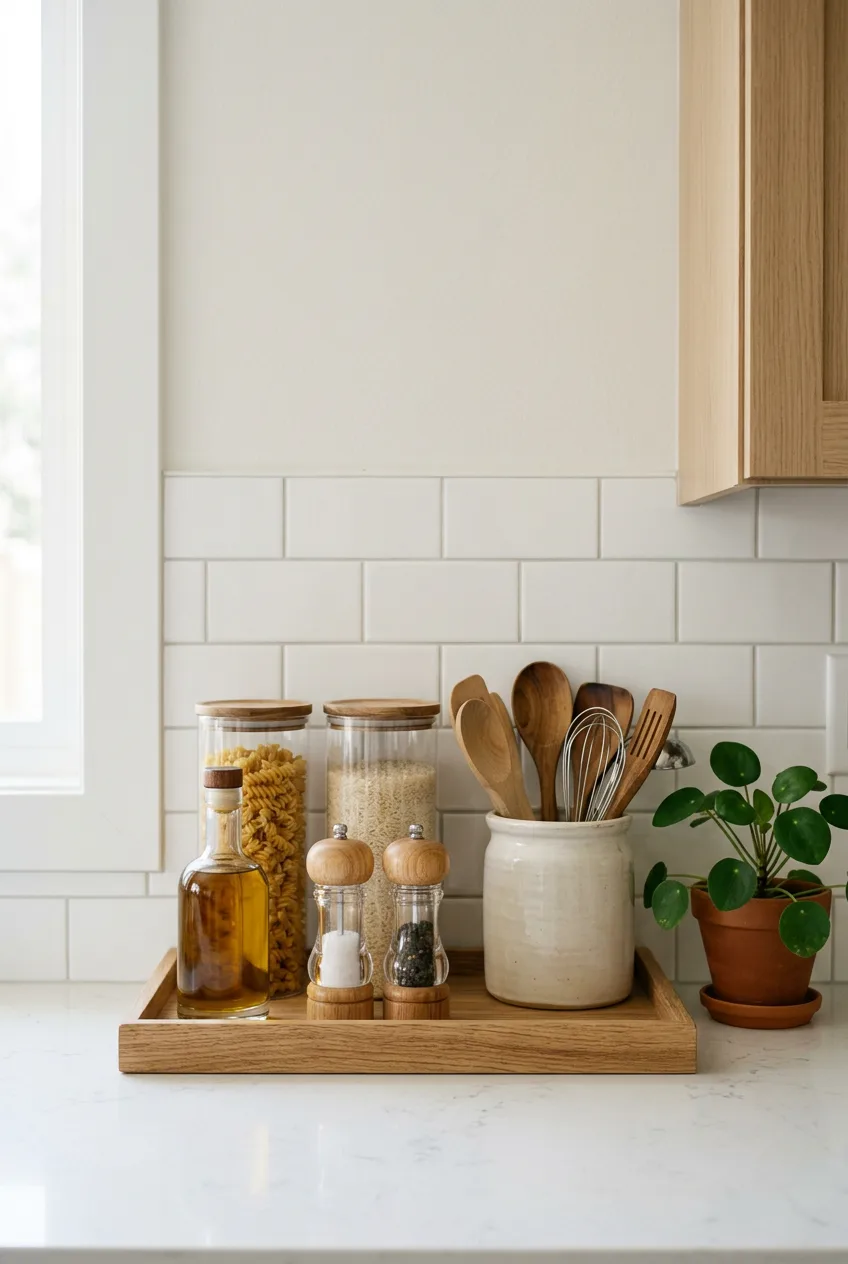
A tray is the easiest way to make a group of items look intentional instead of messy. Corral oils, vinegars, salt and pepper on a wooden or marble tray next to the stove, or soap and a sponge holder by the sink. Trays also make cleaning faster: lift one tray, wipe underneath and set it back down.
10. Use risers and tiered stands to go vertical
If you have limited counter depth, a two-tier stand or riser doubles your usable space for the items that truly need to stay out. Use the bottom tier for heavier items like oils and the top tier for lighter items like small jars. Tiered stands are also handy for fruit in very small kitchens.
11. Decant only what you use constantly
Glass canisters for flour, sugar, coffee or oats look lovely and keep pantry staples fresh, but only decant items you use often enough to justify the counter space. A set of three matching canisters reads as calm; eight mismatched jars read as clutter. Label lids or the back of the jars so anyone in the house can refill the right one.
12. Hang a rail, magnetic strip or shelf on the backsplash
Wall space between the counter and upper cabinets is easy to forget. A magnetic knife strip frees up the space a knife block takes, a rail with S-hooks can hold utensils or small baskets, and a narrow shelf can hold spices or a few cookbooks. In rentals, look for adhesive or tension options that won’t damage tile.
13. Choose a cohesive color palette
Counters look calmer when the items on them share a palette. Choose two or three colors or materials, for example white ceramic, natural wood and glass, and stick with them as you replace things. You don’t need to buy all new items. Simply moving the bright plastic containers into a cabinet often makes the biggest visual difference.
Hide the Bulky Stuff
14. Build an appliance garage or appliance shelf
Small appliances are the biggest counter hogs. If you have a corner cabinet or a deep lower cabinet, turn it into an appliance garage where the toaster, blender and air fryer live. A sturdy pull-out shelf makes heavy appliances easier to lift out. Our small kitchen organization ideas share more ways to stretch tight cabinet space.
15. Use a rolling cart as extra counter space
If your kitchen has a bit of floor space, a slim rolling cart can hold small appliances, a fruit tier or baking supplies. Roll it out when you need it and tuck it beside the fridge or into a pantry when you don’t. Carts are especially useful during holiday baking, when you need temporary landing space for cooling racks and ingredients. Our holiday baking prep guide shows how to set up a baking station before the cookie rush.
16. Store cookbooks off the counter
Cookbooks are beautiful but they take up counter space and get splattered. Keep only the one you’re currently using on a stand and move the rest to a shelf, a cabinet or the pantry. Many cooks find that saving favorite recipes digitally or in a slim binder frees up even more space.
Keep It That Way
17. Do a two-minute nightly counter reset
The single habit that keeps counters clear is a quick reset every night. Put away anything that wandered onto the counter, return items to their trays, wipe surfaces and load the dishwasher. Two minutes before bed means you wake up to a clean kitchen instead of yesterday’s mess. Add a deeper weekly wipe-down to your weekly reset routine and the system practically runs itself.
Your Kitchen Countertop Organization Checklist
- Clear every counter, wipe down and reset with intention
- Keep only daily-use items on the counters
- Rehome mail, keys, chargers and paperwork
- Protect one clear prep zone between the sink and stove
- Set up a cooking station, a coffee station and a simple sink zone
- Group everyday items on trays and use risers for vertical space
- Decant only the staples you use often
- Use backsplash rails, magnetic strips or narrow shelves
- Move small appliances to an appliance garage, shelf or rolling cart
- Store cookbooks off the counter
- Do a two-minute nightly reset
What Actually Works (and Common Mistakes)
The specifics that make the difference, with safety points checked against the public sources listed below.
- Protect one clear prep stretch. Keep at least 24 to 36 inches of open counter, ideally between the sink and stove, with nothing living on it.
- Use the tray rule. Oils, salt and pepper, and the utensil crock sit on one tray. Lift the tray, wipe, put it back: under 30 seconds.
- Keep burnables away from the burners. NFPA advises keeping oven mitts, wooden utensils, food packaging and towels away from the stovetop, which rules out the cookbook stand and paper towels right next to the cooktop.
- Unplug and wipe under appliances. The U.S. Fire Administration recommends unplugging small appliances when you’re not using them; it’s also the moment to sweep the crumbs that collect underneath.
- Don’t let food linger out. USDA’s food-safety guidance says perishable food shouldn’t sit at room temperature for more than 2 hours, and leftovers keep 3 to 4 days in the fridge, so a counter fruit bowl is fine but cooked food is not.
Common mistakes
- Decor that has to be moved every time you cook.
- A knife block wedged behind the stove.
- Letting mail land on the counter; give it a wall pocket or basket by the door instead.
Sources & safety notes: NFPA: Cooking Fire Safety · U.S. Fire Administration: Appliance and Electrical Fire Safety · USDA FSIS: Leftovers and Food Safety. Safety and food-storage points were checked against these pages on November 1, 2026. Spot something wrong? Tell us and we will correct it.
Related guides
Save this for later
Pin this image to your Pinterest board so it’s there when you need it.
 Save to Pinterest
Frequently Asked Questions
What should you keep on your kitchen counters?
Keep only items you use every day or almost every day, such as your coffee maker, a utensil crock, cooking oil, salt and pepper, dish soap and a fruit bowl. Everything else, including occasional-use appliances, extra spices and decor, works better in cabinets, the pantry or on a shelf.
How do I make my kitchen counters look less cluttered?
Group small items on trays, keep a cohesive color palette and leave at least one stretch of counter completely clear. Moving bright plastic items and paperwork out of sight makes a big visual difference even before you buy anything new.
Where should I put small appliances in a small kitchen?
Store appliances you don’t use daily in a lower cabinet, a corner appliance garage, a pantry shelf or a rolling cart. Keep only the one or two appliances you use every day, often the coffee maker and toaster, on the counter.
How do I stop clutter from coming back on my counters?
Give every item a home off the counter, especially mail, keys and chargers, and do a two-minute nightly reset before bed. Clutter builds when there’s no obvious place for things to go, so the homes you create elsewhere matter as much as the counter itself.
Is decanting worth it for kitchen counters?
Decanting is worth it for a few staples you use often, like flour, sugar, coffee or oats, because matching canisters look tidy and keep food fresh. For everything else, it adds work without much benefit, so keep those items in their original packaging in the pantry.
Clear counters make cooking calmer, cleaning faster and the whole kitchen feel bigger. Start tonight with the clear-and-reset method, then pick one station, maybe the coffee corner or the stove zone, to set up this weekend. By the time holiday baking starts, you’ll have the space you need exactly where you need it.
Pingback: Fridge Organization Aesthetic: 21 Pinterest-Worthy Ideas