
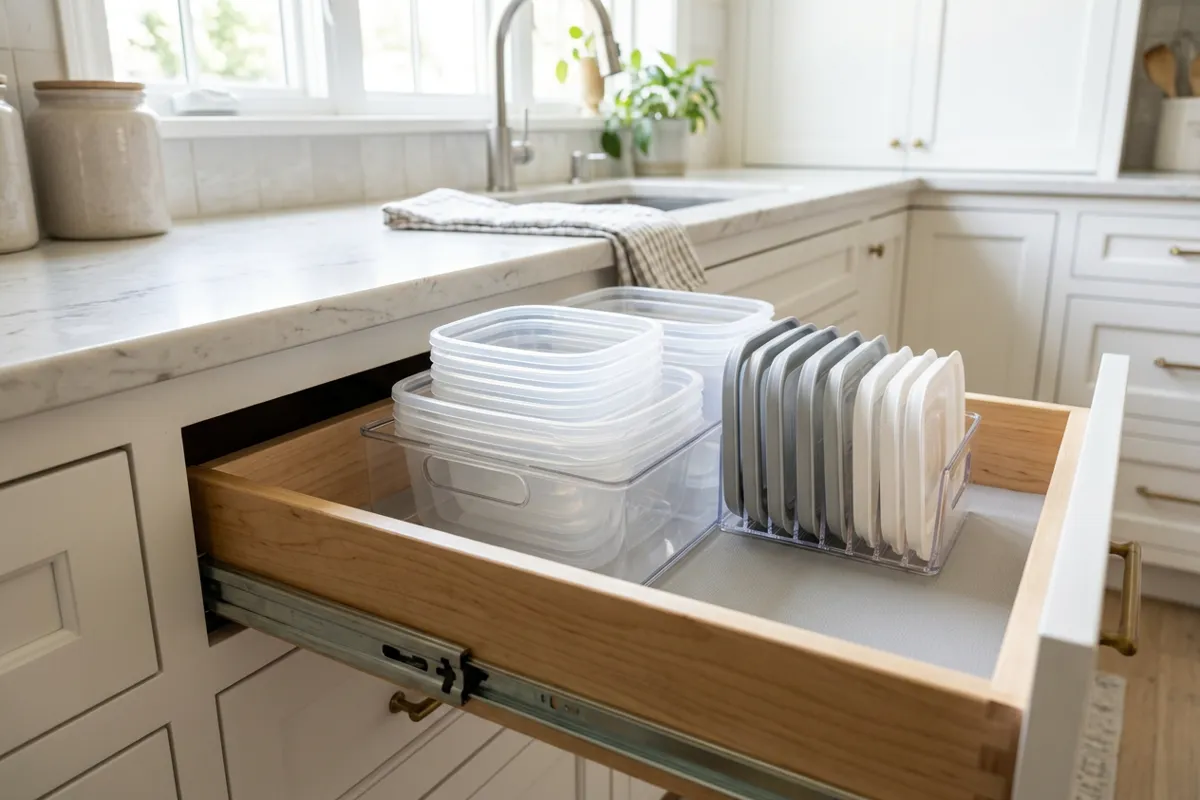
To organize Tupperware lids, match every lid to a container and recycle the orphans, then store lids upright in a file sorter, dish rack or deep drawer divider, sorted by size, right next to the nested containers. Most kitchens can be sorted in under an hour with supplies that cost less than $25.
⏱️ Short on time?
Grab our FREE printable checklists — the exact routines behind every calm home on this blog:
📋 Room-by-Room Checklist (PDF)📅 Weekly Reset Checklist (PDF)
Part of our Kitchen Cleaning & Organization Guide, which brings every related post together in one place.
Below you’ll find a 6-step method, 8 storage setups for drawers, cabinets and tight spaces, and the tricks that keep lids from drifting back into chaos. It works for plastic, glass and silicone containers alike.
Why Tupperware Lids Are Always a Mess
Lids come in many shapes, are flat and slippery, and get washed and dried separately from their containers. That makes them nearly impossible to stack neatly. Add mismatched sets from takeout, gifts and old leftover tubs, and you have a drawer that never closes. The good news is that most kitchens only need about 10 to 15 working container sets.
What You Need
- A box or laundry basket for the declutter pile
- A tape measure to check drawer and shelf depth
- A file-style lid organizer or adjustable dividers
- A label maker or masking tape
- Optional: a shallow bin, an over-the-door rack or a cabinet-door pocket
How to Organize Tupperware Lids in 6 Steps
Step 1: Empty everything onto the counter
Pull out every container and lid, including the ones in the dishwasher, lunch bags and the back of the fridge. You can’t judge what you own until you see it all in one place.
Step 2: Match lids to containers
Snap each lid onto a container. Any container without a lid and any lid without a container goes to a separate pile. This usually shows that you own far more pieces than working sets.
Step 3: Toss or recycle what doesn’t work
Discard warped, cracked, stained or scratched pieces, anything that no longer seals and orphans without a match. Check your local recycling rules for plastics, as acceptance varies by number and town. Keep one or two spare lids at most. For related kitchen clean-outs, our refrigerator cleanout guide pairs well with this step.
Step 4: Keep a realistic number
A family of four rarely needs more than 12 to 15 sets, with a few small sizes for sauces and snacks. Standardizing on one brand or one shape makes stacking and storing far easier, so replace mismatched pieces only as old ones wear out.
Step 5: Decide the storage method
Measure your drawer or shelf depth and height, then pick from the setups below. Store lids at the same level as containers, so you pull both at once.
Step 6: Label and put it away
Label shelf edges or bin fronts by size: small, medium, large and round. A visible system is one family members follow without being told.
8 Tupperware Lid Storage Ideas
| Setup | Best for | Space needed | Approx. cost |
|---|---|---|---|
| File-style lid organizer | Drawers with mixed lids | Drawer 3 to 4 inches high | $10 to $20 |
| Adjustable drawer dividers | Deep drawers | Drawer 3+ inches high | $12 to $25 |
| Cabinet-door pocket or rack | Small kitchens | Inside of one door | $10 to $20 |
| Shallow bin on a shelf | Cabinets with no drawers | One shelf | $5 to $15 |
| Magazine file holders | Flat and wide lids | Shelf depth 10 inches | $8 to $15 |
| Lazy Susan for containers | Corner cabinets | One corner | $15 to $25 |
| Nest containers, lids in a bin | Large collections | One shelf | $5 to $15 |
| Lid stays on container | Lids that fit flat | None extra | Free |
Our food storage container organization ideas go deeper on containers, and the small kitchen organization ideas cover cabinets where space is tight.
Upright file system for drawers
Standing lids on edge like files is the most reliable method. A tiered or adjustable rack holds each lid in its own slot, so you see every one at a glance. Place the rack at the front of the drawer and containers behind it.
Magazine files for cabinet shelves
Stand cardboard or plastic magazine files on a shelf and slide lids in by size. They’re cheap, narrow and easy to pull out for cleaning.
Door-mounted racks for small kitchens
The inside of a cabinet door is dead space. A slim rack or pocket holds 6 to 10 lids and frees up a full shelf. Check that the door clears the shelf contents before you mount it.
How to Stop Lids and Containers From Separating
- Store containers nested and lids in their own rack, but only for sets you actually use.
- Choose containers where the lid snaps on the base and stores flat, so each set stays together.
- Wash and dry them together, then snap lids on before putting them away.
- Put a small dot of colored tape on matching pairs if your sets look alike.
Storing Glass, Plastic and Silicone Lids
Different materials need different handling. Plastic lids warp in high heat, so keep them away from the stove and store them on the top rack of the dishwasher. Glass containers are heavy, so give them a low shelf and nest only identical sizes. Silicone lids are floppy and stack well flat in a shallow bin, but they can hold odors, so wash them with a baking soda soak now and then.
If you meal prep, set aside a dedicated bin for the containers you use weekly, kept at eye level. Everything else, such as party-size bowls and holiday sets, can go on a higher shelf. This single change makes the daily drawer far smaller and easier to keep neat.
Square and rectangle containers use space far better than round ones, because they stack with no gaps. When you replace old pieces, choose one or two shapes in three sizes, and you will cut your lid count and your storage footprint in half. For fridge-side organizing, our refrigerator cleanout guide shows how to rotate leftovers so containers return to the cabinet faster.
Habits That Keep It Organized
- Do a two-minute reset after unloading the dishwasher.
- Never keep a container without a matching lid.
- Do a quick check every three months and recycle what’s worn out.
- Return containers when guests bring leftovers home, so they don’t pile up elsewhere.
- Add this to your room-by-room cleaning checklist as a quarterly task.
What Actually Works (and Common Mistakes)
The specifics that make the difference, with safety points checked against the public sources listed below.
- Run the match test first. Pull everything out, snap each lid onto a container, and recycle or repurpose anything without a partner. Orphan lids are most of the mess.
- Store lids vertically. A $5–$10 file sorter or plate rack holds 15 to 25 lids on edge so you can see sizes at a glance, instead of digging through a pile.
- Keep one or two brands. Containers from the same line nest and share lid sizes; a drawer of five brands never closes.
- Label leftovers. USDA says leftovers keep 3 to 4 days in the refrigerator, so a strip of masking tape with the date on each lid stops the guesswork. USDA also recommends airtight, well-sealed containers, so replace lids that no longer snap shut.
- Never reuse food containers for chemicals. EPA advises never storing household chemicals in food containers; keep cleaning products in their original labeled bottles.
Common mistakes
- Keeping warped lids that only ‘almost’ close.
- Stacking lids flat in a deep cabinet, where the one you need is always at the bottom.
- Saving every takeout tub; keep a few for freezer portions and recycle the rest where your local program accepts them.
Sources & safety notes: USDA FSIS: Leftovers and Food Safety · EPA: Household Hazardous Waste. Safety and food-storage points were checked against these pages on November 1, 2026. Spot something wrong? Tell us and we will correct it.
Keep going: with the containers sorted, give the fridge the same treatment with these aesthetic fridge organization ideas.
Related guides
Save this for later
Pin this image to your Pinterest board so it’s there when you need it.
 Save to Pinterest
Good to know: Check the bottom of each container for its recycling number and your local program’s rules before you recycle plastics. Acceptance varies by town.
Frequently Asked Questions
What is the best way to store tupperware lids?
Store them upright like files in a drawer organizer or cabinet rack, sorted by size, next to the containers. Standing lids on edge means you can see and grab each one without unstacking.
How do you organize tupperware without a drawer?
Use a shallow bin or magazine files on a shelf for lids, nest the containers beside them, and add a door rack to use the inside of a cabinet door.
How many food storage containers do you really need?
Most households need 12 to 15 container sets, with a few small sizes for sauces. Keep only those with working, matching lids.
What should I do with lids that have no container?
If you don’t have a container they fit within a month, recycle them where your local program accepts that plastic, or reuse one as a coaster or paint palette.
How do you keep tupperware lids from getting lost?
Stick to one container style, wash and store sets together with lids snapped on, and keep a visible lid rack so strays are spotted quickly.
A tupperware drawer that stays tidy comes down to three moves: keep only matched sets, give lids an upright home and do a two-minute reset after the dishes. Do it once, and you’ll never face the lid avalanche again.